7 GUIs: Implementing an Interactive Timer in LiveView
This is the fourth post handling the 7 GUI tasks in LiveView. I cover some highlights of implementing an interactive timer — the fourth of the 7 GUI tasks.
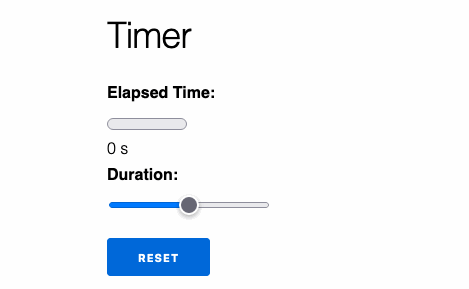
The Timer
These are the task’s requirements:
- We must have a gauge for the elapsed time.
- We must have a label that shows the elapsed time as a number.
- We must have a slider that can change the duration of the timer.
- Changing the slider should immediately cause the elapsed time gauge to change.
- When the elapsed time is greater than or equal to the duration (when the gauge is full), the timer should stop. If we then move the slider to increase the duration, the timer should resume.
- Finally, we should have a reset button that resets the elapsed time to zero.
The Challenge
The most interesting challenges of the task were dealing with the passage of time and rendering and synchronizing the elapsed time gauge and duration slider. So I will focus most on those areas.
Let’s get to it!
Rendering our components
Thanks to HTML, rendering the different components was easy.
To render the gauge, we use a <meter> element. We bind the value to
@elapsed_time, and we set the maximum value to @duration. That way, when we
change the @duration, our meter is automatically adjusted.
<meter min="0" value="<%= @elapsed_time %>" max="<%= @duration %>"><%= @elapsed_time %></meter>
For the slider, we use an <input type="range">. We keep things
simple by allowing it to go from 0-100 in 1 step increments.
<input type="range" name="duration-slider" min="0" max="100" step="1">
Interacting with the slider
Interacting with the slider was the most complex part of the exercise because of the following requirement:
Adjusting S [the slider] must immediately reflect on d [the duration] and not only when S is released. It follows that while moving S the filled amount of G [the gauge] will (usually) change immediately.
In other words, we could not wait until the user drops the slider in its new position to update the gauge. We needed to update values as the slider moved.
Doing a little digging, I learned that the correct event to use is the input event:
The input event is fired every time the value of the element changes. This is unlike the change event, which only fires when the value is committed, such as by pressing the enter key, selecting a value from a list of options, and the like.
Thus, it was clear that we couldn’t use our trusted phx-change attribute.
Instead, we wanted something like phx-input, but LiveView doesn’t have a
phx-input! 😱
Thankfully, LiveView has great interoperability with JavaScript via hooks. So, I
created a Slider hook and attached it via phx-hook="Slider".
-<input type="range" id="duration-slider" name="duration-slider" min="0" max="100" step="1">
+<input phx-hook="Slider" type="range" id="duration-slider" name="duration-slider" min="0" max="100" step="1">
The Slider hook adds an event listener for input events and pushes an
“update-duration” event with new value:
let Hooks = {}

Hooks.Slider = {
  mounted() {
    this.el.addEventListener("input", (e) => {
      this.pushEvent("update-duration", {value: e.target.value});
    });
  }
}
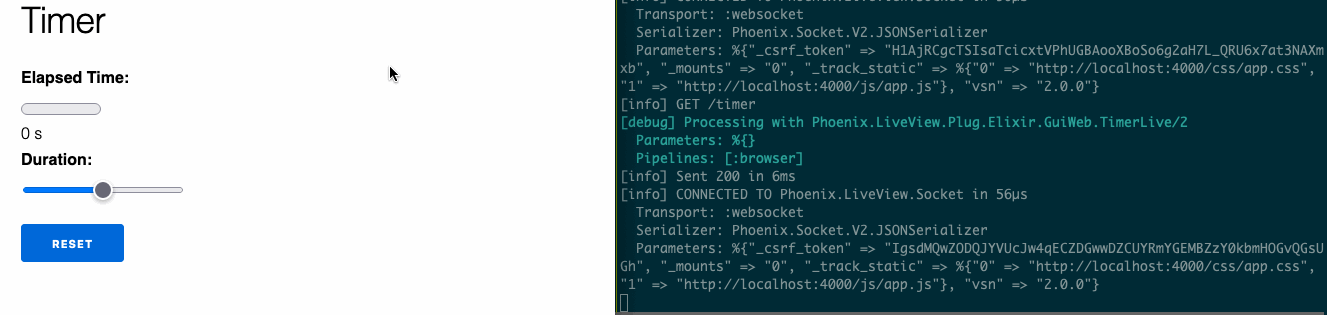
The interoperability through Hooks has always been straightforward (yet another fantastic thing about LiveView). Take a look at all the events being sent to the server as we move the slider:
To keep things simple (and because things worked well locally), I did not add
any debouncing, which we could do in JavaScript or with phx-debounce if we’d
used something like phx-change.
Once the events were sent to the back-end, handling them in Elixir was easy. We
simply take the value and update :duration assign:
  def handle_event("update-duration", %{"value" => value}, socket) do
    socket
    |> assign(:duration, String.to_integer(value))
    |> noreply()
  end
Dealing with time
When I first read the task’s description, I wondered how difficult it would be to deal with time. Most importantly, how would we stop the timer when the gauge was full?
It seemed to me that dealing with time would be difficult, and it would make code more complex. So, instead of dealing with it first, I decided to separate the UI from the timer running in the background.
To do that, I created a TimerLive.tick/1 function that simulated the passage
of time for my LiveView:
  def tick(pid) do
    send(pid, :tick)
  end
It turns out (to no one’s surprise but my own) that the decision to separate the UI from the timer made dealing with time simple.
Our TimerLive doesn’t actually care what does the ticking. It simply
increments :elapsed_time by 1 whenever it gets a :tick message.
And that concern about having to stop the timer? Well, it turns out we don’t
have to stop the timer at all. We can leave it running. Our UI will simply
ignore :tick events when the elapsed time is greater than or equal to the
duration:
  def handle_info(:tick, socket) do
    elapsed_time = socket.assigns.elapsed_time
    duration = socket.assigns.duration

    if elapsed_time < duration do
      socket
      |> update(:elapsed_time, fn time -> time + 1 end)
      |> noreply()
    else
      noreply(socket)
    end
  end
Starting the timer
Since we set up all the plumbing and our UI can react to :tick events, we can
finally introduce a timer.
For a while, I considered having an external process deal with time, and
TimerLive would receive messages from that timer. But in the end, it proved
simpler to start the timer in TimerLive itself.
Thus, when TimerLive is connected — meaning it’s not the initial
stateless render of the page — we schedule an Erlang :timer that will
tick every second (1_000 ms).
   def mount(_, _, socket) do
     socket =
       socket
       |> assign(:elapsed_time, 0)
       |> assign(:duration, 50)
+
+    if connected?(socket), do: schedule_timer()

     {:ok, socket}
   end
+
+  def schedule_timer do
+    :timer.send_interval(1_000, :tick)
+  end
Voilà! ✨
Testing
If you know me, you know I like test-driven development. And test-driving the
implementation of TimerLive was a lot of fun.
It was because of tests that I wanted to control the passage of time, which lead
me to create the TimerLive.tick/1 function. Through that function, my tests
could increment time discretely.
Take a look at the test testing that the elapsed time changes with every tick:
  test "elapsed time is updated with every tick", %{conn: conn} do
    {:ok, view, _html} = live(conn, "/timer")

    TimerLive.tick(view.pid)
    TimerLive.tick(view.pid)

    assert view |> elapsed_time("2 s") |> has_element?()
    assert view |> elapsed_time_gauge("2") |> has_element?()
  end

  defp elapsed_time_gauge(view, text \\ nil) do
    element(view, "#elapsed-time-gauge", text)
  end

  defp elapsed_time(view, text \\ nil) do
    element(view, "#elapsed-time", text)
  end
Testing the duration slider was also interesting. Since we had a phx-hook, we
couldn’t test the JavaScript side, but we could test everything on the Elixir
side via render_hook/3.
We targeted the #duration-slider element (which ensures we have phx-hook
attached to it), and then we simulate the message our JavaScript hooks sends by
passing the “update-duration” event with the %{"value" => "10"} payload.
  test "duration slider changes maximum elapsed time", %{conn: conn} do
    {:ok, view, _html} = live(conn, "/timer")

    view
    |> element("#duration-slider")
    |> render_hook("update-duration", %{"value" => "10"})
The assertion was a little trickier. We wanted to make sure that changing the slider updated the gauge’s maximum time. To do that, we use a little bit of CSS-selector magic:
    assert view |> max_elapsed_time("10") |> has_element?()
  end

  defp max_elapsed_time(view, max) do
    element(view, "#elapsed-time-gauge[max=#{max}]")
  end
If you’re interested in seeing all the tests, take a look at the test file. And if you’re really interested in Testing LiveView, check out my Testing LiveView course.
Resources
These are links to the repo with all my examples and the commit for the Timer:
You can also find my posts for the previous tasks:
For a full description of all tasks, take a look at the 7 GUIs website.